
Working with a Trove collection in Tropy#
You want to be able to work on a collection of digitised images from Trove on your desktop – adding notes, transcriptions, and annotations. Tropy is a useful tool for managing collections of research images, but how do you import a collection of images from Trove into Tropy? This tutorial walks through one possible method.
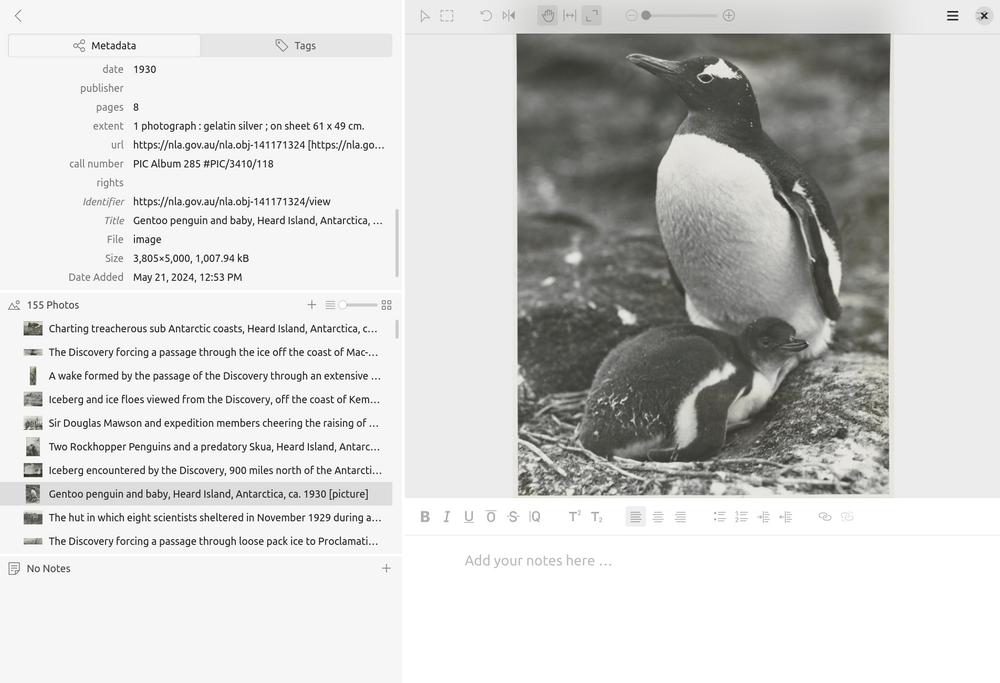
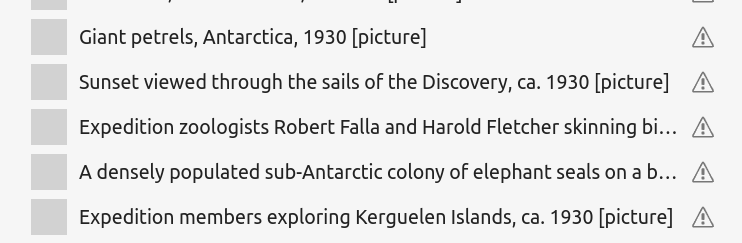
Fig. 28.1 The Tropy interface showing photographs imported from the B.A.N.Z. Antarctic Research Expedition photographs (https://nla.gov.au/nla.obj-141170265).#
Tools and standards#
![]()
This notebook harvests metadata describing the contents of a digitised collection in Trove and saves it as an IIIF manifest. This makes it possible to work with data from Trove in a variety of IIIF-compliant tools.

IIIF is a set of open standards for delivering high-quality, attributed digital objects online at scale.
![]()
Tropy is free, open-source software that allows you to organize and describe photographs of research material.
Identifying a collection in Trove#
The first thing you need is a collection to harvest! More specifically, you need to find a collection’s landing page in Trove’s digitised collection viewer. Once you’ve found the collection page, you can copy its nla.obj identifier.
Finding collection pages#
<– see also link to GW list of finding aids? –>
Trove groups digitised resources into collections of different shapes and sizes. Here are some examples:
an album of photographs from the B.A.N.Z. Antarctic Research Expedition
a collection of postcards featuring actresses and Australian towns
Collections can contain a variety of formats including photographs, posters, art works, ephemera, letters, and manuscripts.
Finding collections in Trove can be tricky because there’s no way of filtering search results to only show collections. This means your search results might include collections, as well as individual items from those collections. See Finding NLA digitised content you can download for help with finding digitised resources. Search results will include a View link that takes you to Trove’s digital resource viewer.
Most collections have a landing page with a big green button that says ‘Browse this collection’.

Fig. 28.2 The landing page for the B.A.N.Z. Antarctic Research Expedition photographs (https://nla.gov.au/nla.obj-141170265)#
If your search results lead to an item within a collection, rather than a landing page, you can usually navigate up the collection hierarchy by using the breadcrumb links.
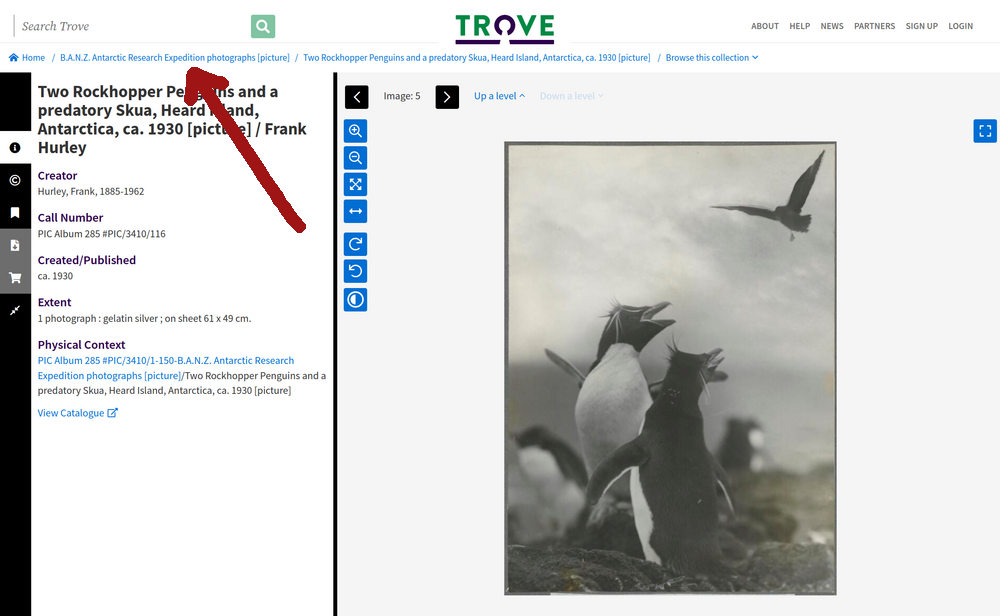
Fig. 28.3 An photo within the B.A.N.Z. Antarctic Research Expedition collection (https://nla.gov.au/nla.obj-141171021) – clicking on the breadcrumb link will take you up to the collection landing page.#
Collections can also include other collections. For example, the Barton Papers are divided into series, and each series has its own landing page. Here’s the landing page for Series 6, Papers relating to the Federation Campaign. However, the finding aid only links to items within a series, not to the series landing page itself. To get to the series page from the finding aid, you need to go down the hierarchy to an item in the series, then back up the breadcrumbs trail.
Navigation within collections can be confusing, and it can sometimes be hard to tell what level of the collection hierarchy you’re actually on. Because of this it might take a bit of trial and error to get to the page you need to harvest the collection data you’re actually interested in.
Getting the collection’s nla.obj identifier#
Once you’ve found the collection’s landing page you need to copy its nla.obj identifier. You can find the identifier in a couple of places.
If the page has a Cite button or tab, click on it to reveal more information about the collection, including the identifier.
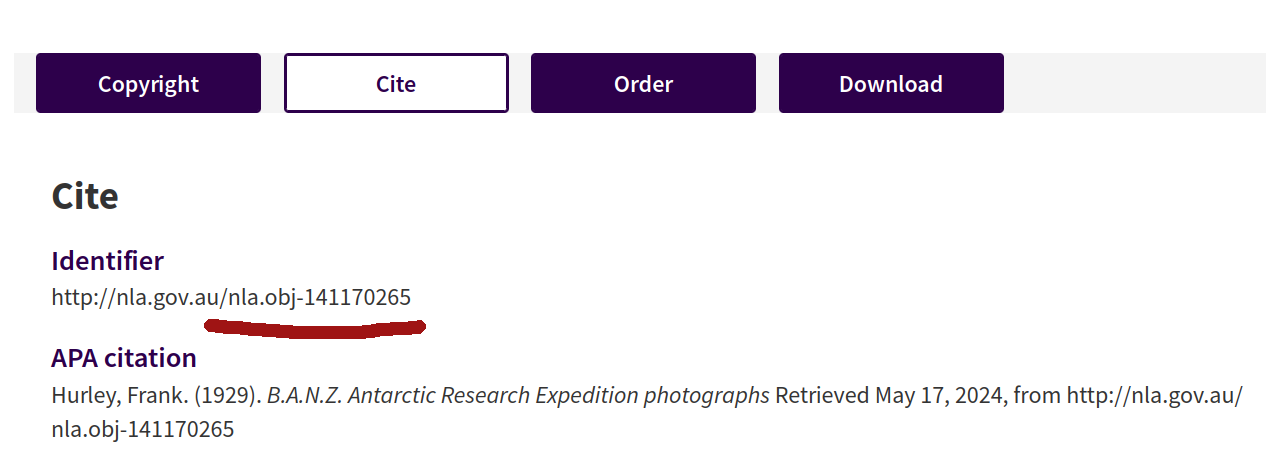
Fig. 28.4 Clicking on the Cite button reveals the collection’s identifier.#
You don’t need the full identifier url, just the section that starts with nla.obj. So, in the example above, the identifier value would be nla.obj-141170265.
Alternatively, you can just grab the identifier from your browser’s location bar.
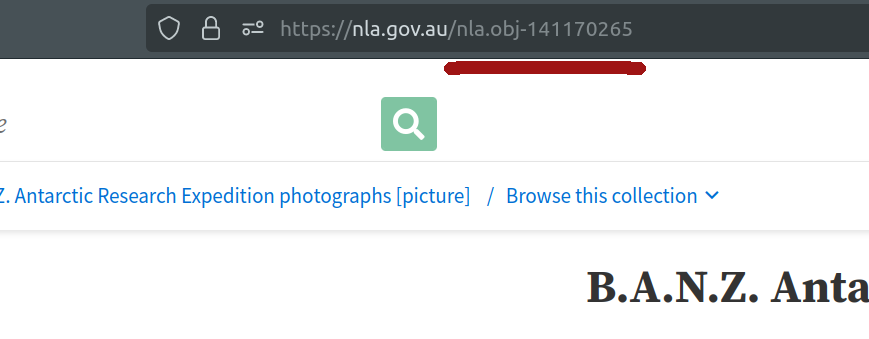
Fig. 28.5 Your browser’s location bar includes the identifier of the current page.#
Copy the nla.obj to use in the next step.
Saving a Trove collection as an IIIF manifest#
The first step in importing Trove data into Tropy is to save the data in a format that Tropy understands. Tropy has plugins that enable it to import data from CSV files and IIIF manifests. You can save a Trove collection as an IIIF manifest using this noteboook in the GLAM Workbench.
What is IIIF?#
The International Image Interoperability Framework, more conveniently known as IIIF, develops open standards for sharing digital objects, such as images. IIIF platforms and standards are used by GLAM organisations around the world to deliver their image collections online.
Once you have standards for sharing image metadata, people can build tools that work across collections. For example, Universal Viewer and Mirador are both richly featured, open source, community developed image viewing platforms.
IIIF manifests are JSON files that describe a set of digital objects. They include technical information about the images and how to access them, as well as metadata describing their content and context. Everything you need to explore the images is packaged up in a single, standards based file. This means that if you point a manifest at tools like Universal Viewer and Mirador, they can present the images to users without any special configuration. Similarly, Tropy knows what to expect when you import data from an IIIF manifest.
Unfortunately Trove doesn’t provide data using IIIF standards. Indeed, it doesn’t really supply any machine-readable data about the contents of digital collections. The GLAM Workbench notebook scrapes metadata from Trove’s digital collection viewer, reassembling it as a standard IIIF manifest.
Running the notebook#
Go to Save a collection of digitised images as an IIIF manifest in the Trove images section of the GLAM Workbench.
This notebook, like all GLAM Workbench notebooks, needs to be run in a customised computing environment. The easiest way to do this is through BinderHub. BinderHub is a cloud-based service that gets a notebook up and running by reading its requirements from a code repository, and creating an environment with the necessary software. The GLAM Workbench is integrated with two BinderHub services:
ARDC Binder – based in Australia, requires login using university credentials
MyBinder – international, no login required
If you have a login at an Australian university or research agency, try the ARDC Binder service first. It’s a little more effort, but it’s usually faster and more reliable than the public MyBinder service which can have capacity issues.
The GLAM Workbench displays a preview of the notebook, with options to run it using either the ARDC Binder or MyBinder service.
Fig. 28.6 The GLAM Workbench provides a number of ways you can run the notebook.#
Using ARDC Binder#
To use the ARDC Binder service, click on the ARDC Binder tab under the notebook preview. You should see a big, blue Run live on ARDC Binder button. Click on the button to launch the Binder service.
If this is the first time you’ve used the ARDC Binder service you’ll be asked to login using the Australian Access Federation (AAF).
Fig. 28.7 ARDC Binder will ask you to log in using AAF#
Click on the Sign in with AAF/Tuakiri button. You’ll be asked to select either AAF or Tuakiri – select AAF.
To sign in with AAF, select your institution from the list, then click the Continue to your organisation button.
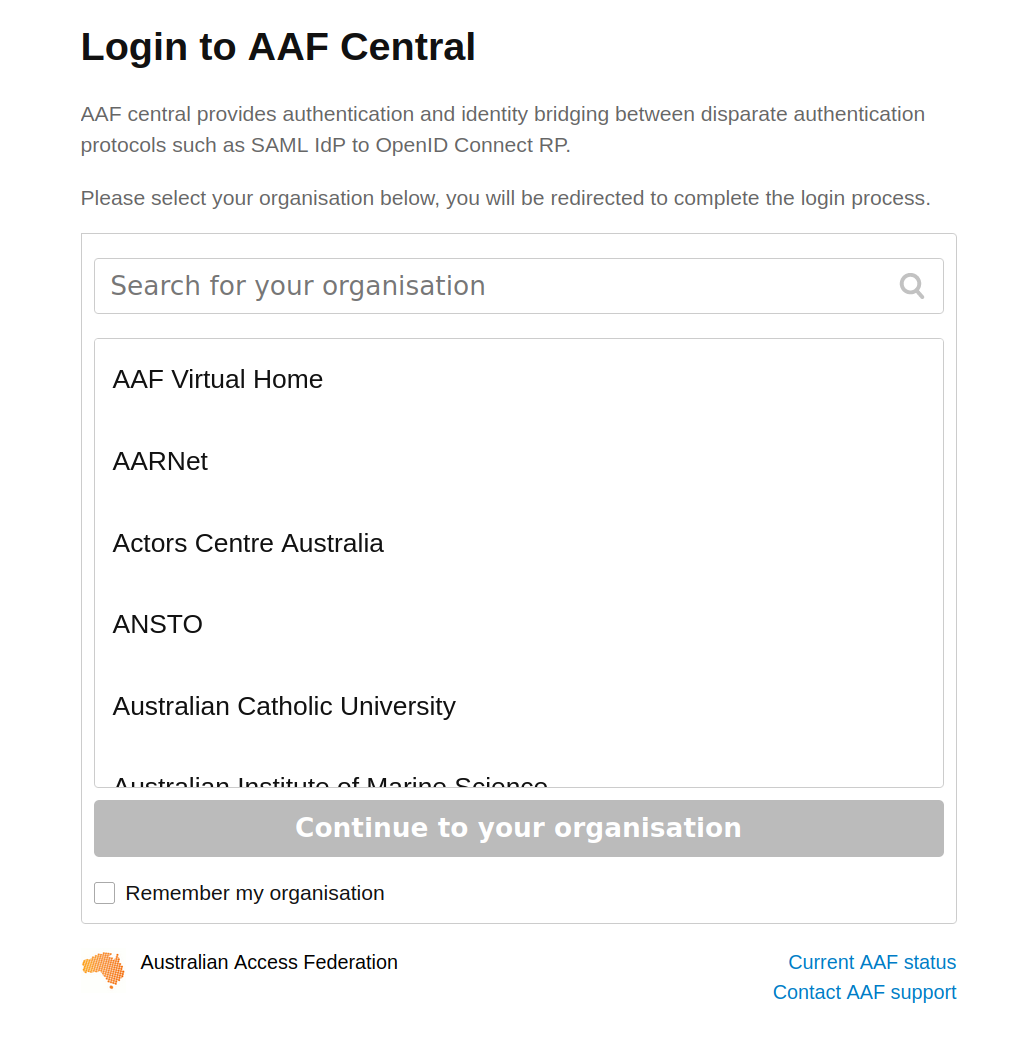
Fig. 28.8 Select your institution from the AAF list#
You’ll be redirected to your insitution’s login screen. Log in using your usual credentials. Once you’ve logged in you’ll be redirected back to ARDC Binder and the notebook will start to load. You might have to wait a bit while a customised computing environment is prepared for you. If you see a message saying that things are taking a long time and there might be a problem, just ignore it. Eventually the notebook will load in the Jupyter Lab interface.
Using MyBinder#
Fig. 28.9 Click on the MyBinder tab.#
To use the MyBinder service, click on the MyBinder tab under the notebook preview. You should see a big, blue Run live on MyBinder button. Click on the button to launch the Binder service. No login is required, so MyBinder immediately starts building a customised computing environment. This can take a while, but eventually the notebook should load in the Jupyter Lab interface.
Using the notebook in Jupyter Lab#
No matter what service you use to run the notebook, the result will be the same – the notebook will open in the Jupyter Lab interface.
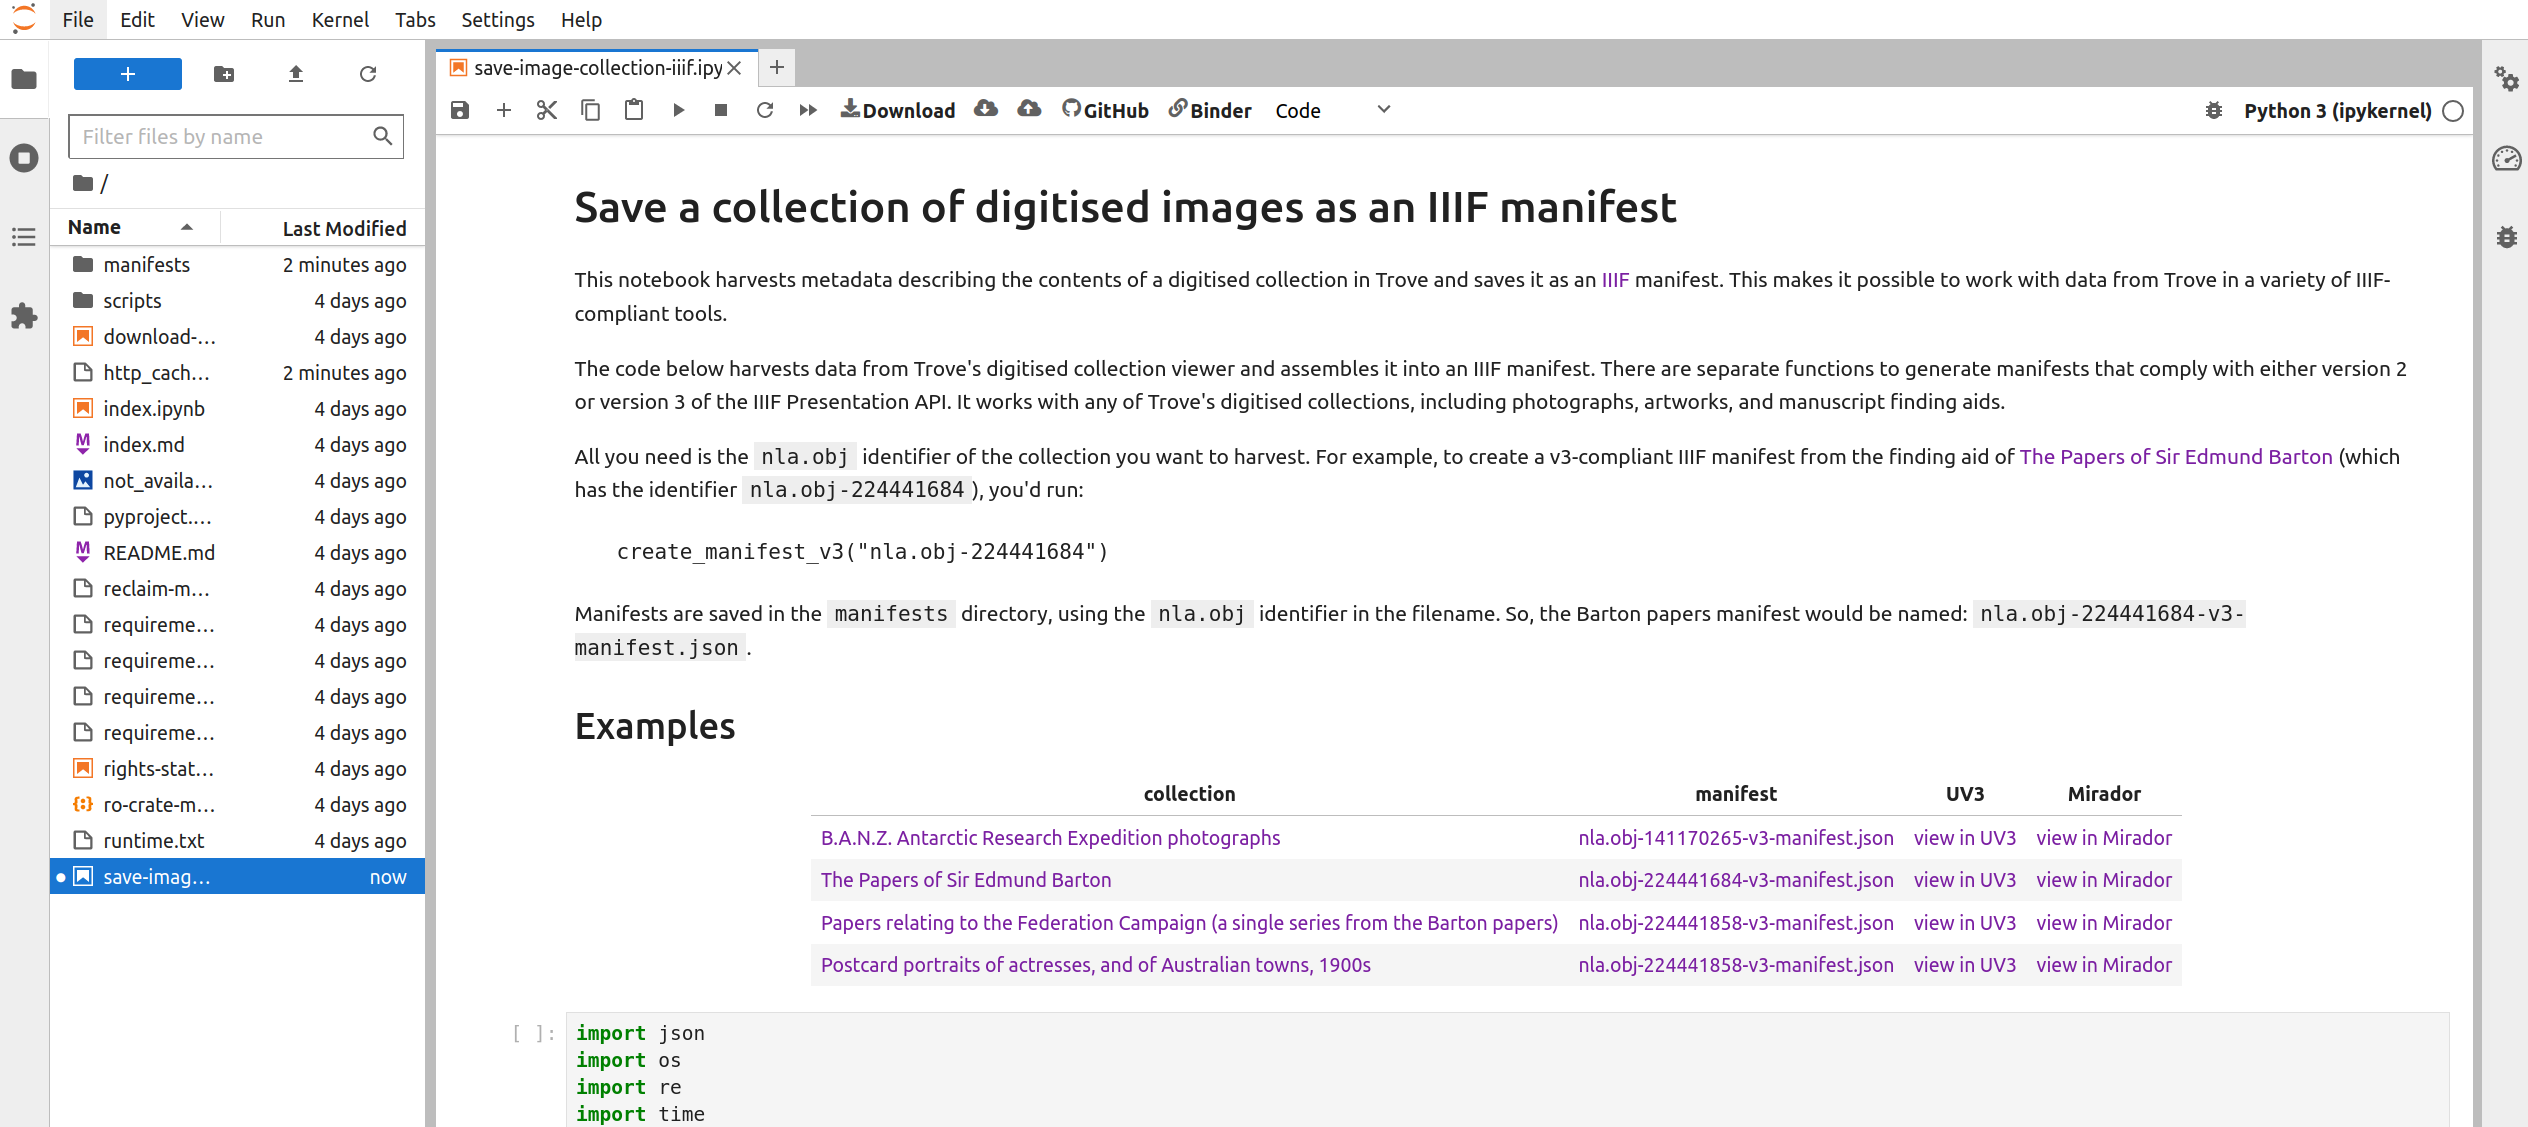
Fig. 28.10 The notebook running in Jupyter Lab.#
The Jupyter Lab interface has two main panes – a file browser is on the left, while the current notebook is displayed in the main, central pane.
Scroll down the notebook until you come to a line that reads create_manifest_v3("nla.obj-140670968"). You need to edit this line to save your collection for Tropy:
click on the line of code, you’ll see the border of the cell is highlighted – this means it’s ready for editing
change
create_manifest_v3tocreate_manifest_v2(this tells the notebook to create a manifest that conforms to version 2 of the IIIF API)replace the
nla.obj-140670968value with the identifier of the collection you want to harvest (keep the double quotes around the identifier)
For example, the B.A.N.Z. Antarctic Research Expedition collection mentioned above has the identifier nla.obj-141170265. To tell the notebook to save this collection as an IIIF manifest, you need to change the line of code to create_manifest_v2("nla.obj-141170265").
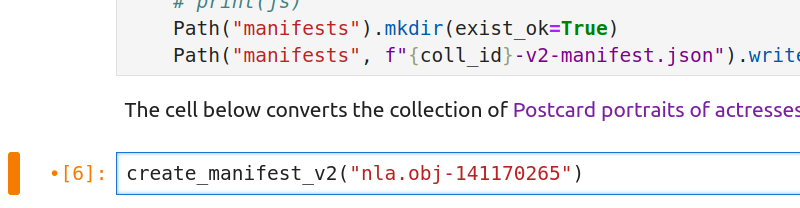
Fig. 28.11 Change v3 to v2 and insert your collection’s identifier as shown#
You can now start the harvest! From Jupyter Lab’s ‘Run’ menu select ‘Run all cells’. You’ll notice that the square brackets next to the line of code you edited will now contain an asterisk. This indicates the code is running. Once it’s finished, the asterisk will change to a number.
The harvesting process gathers information from every item in the collection. This takes time. Depending on the size of the collection, it could take a few minutes, or more than an hour, to generate the IIIF manifest. You’ll know that the harvest has finished when the asterisk in the square brackets has changed to a number, and a new manifests folder has appeared in the file browser.
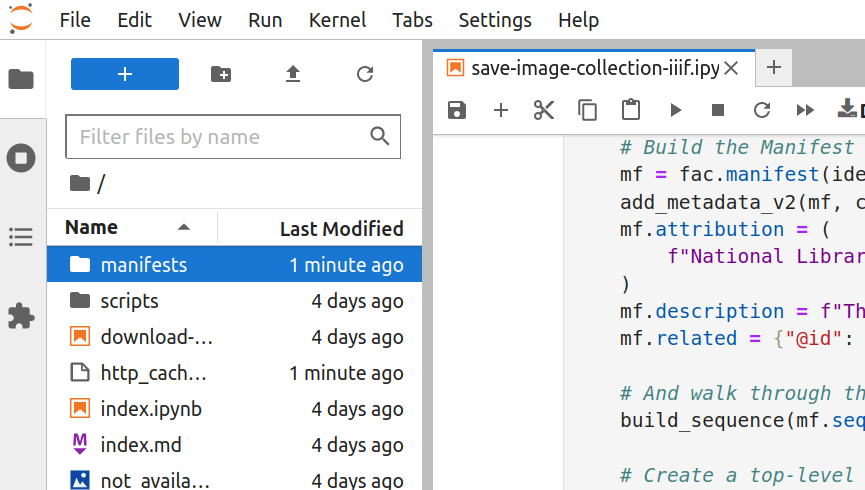
Fig. 28.12 Double click to open the folder#
Once the harvest has finished, double click on the manifests folder to open it. Your newly-created IIIF manifest will be inside.
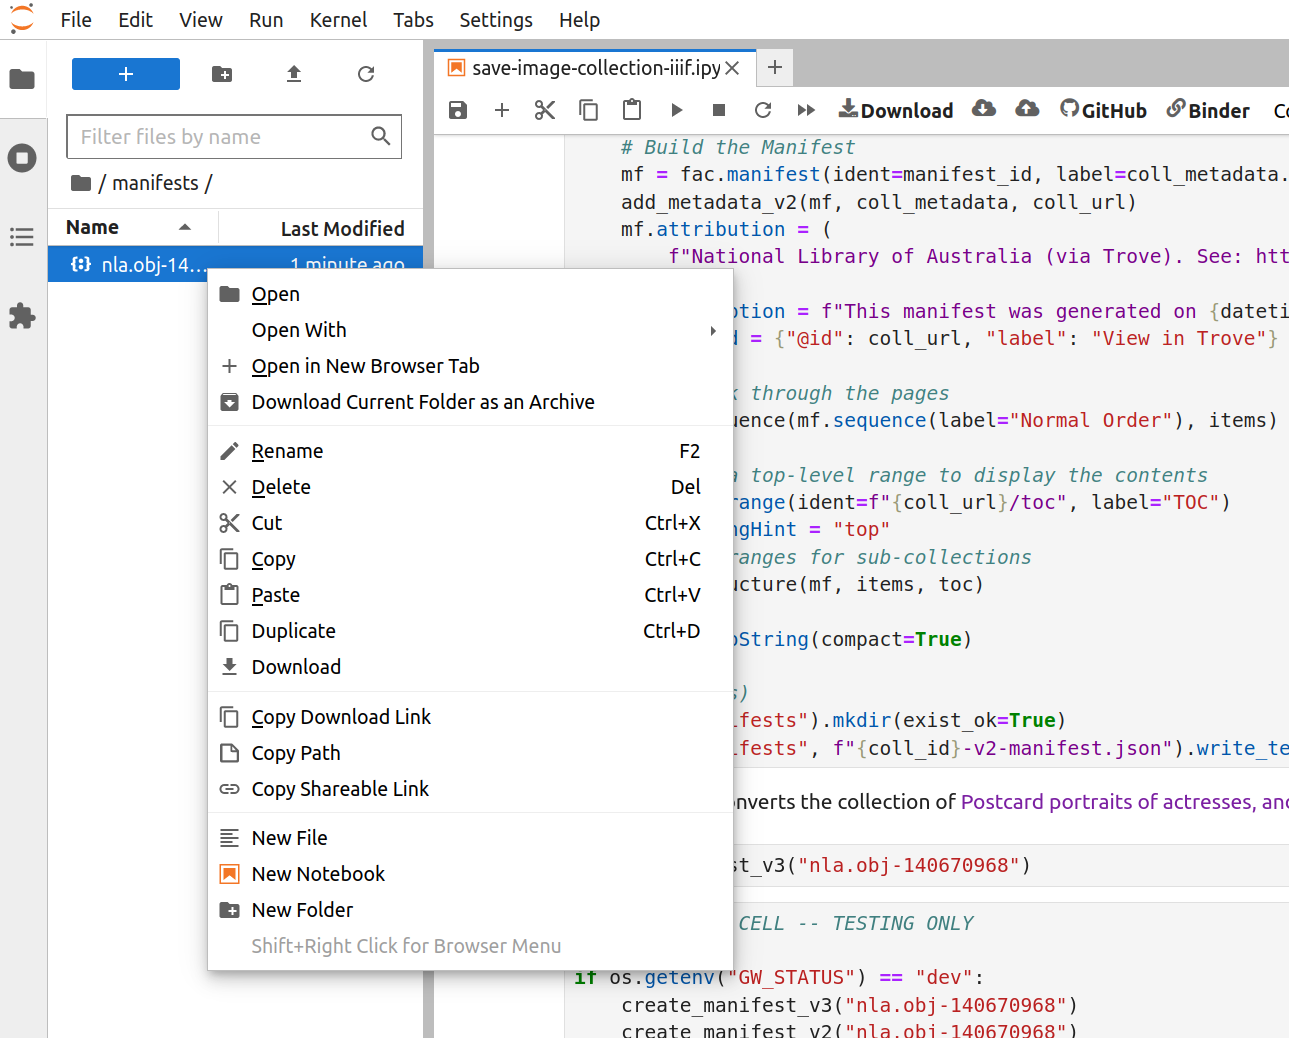
Fig. 28.13 Right click on the file#
Right-click on the manifest file and select ‘Download’ from the menu. The manifest file will be saved to your local computer.
Installing Tropy and the IIIF Manifest plugin#
If you haven’t already, download and install Tropy from the Tropy home page. For an introduction to using Tropy, see the documentation section.
To import IIIF manifests into Tropy yoou need to install the IIIF plugin:
download the zip file from the plugin’s GitHub repository
open up Tropy and select ‘Preferences’ from the ‘Edit’ menu
select the ‘Plugins’ tab
click on the Install Plugin button and select the downloaded zip file
the IIIF Plugin will now be listed on the ‘Plugins’ page, click on the plugin’s Enable button
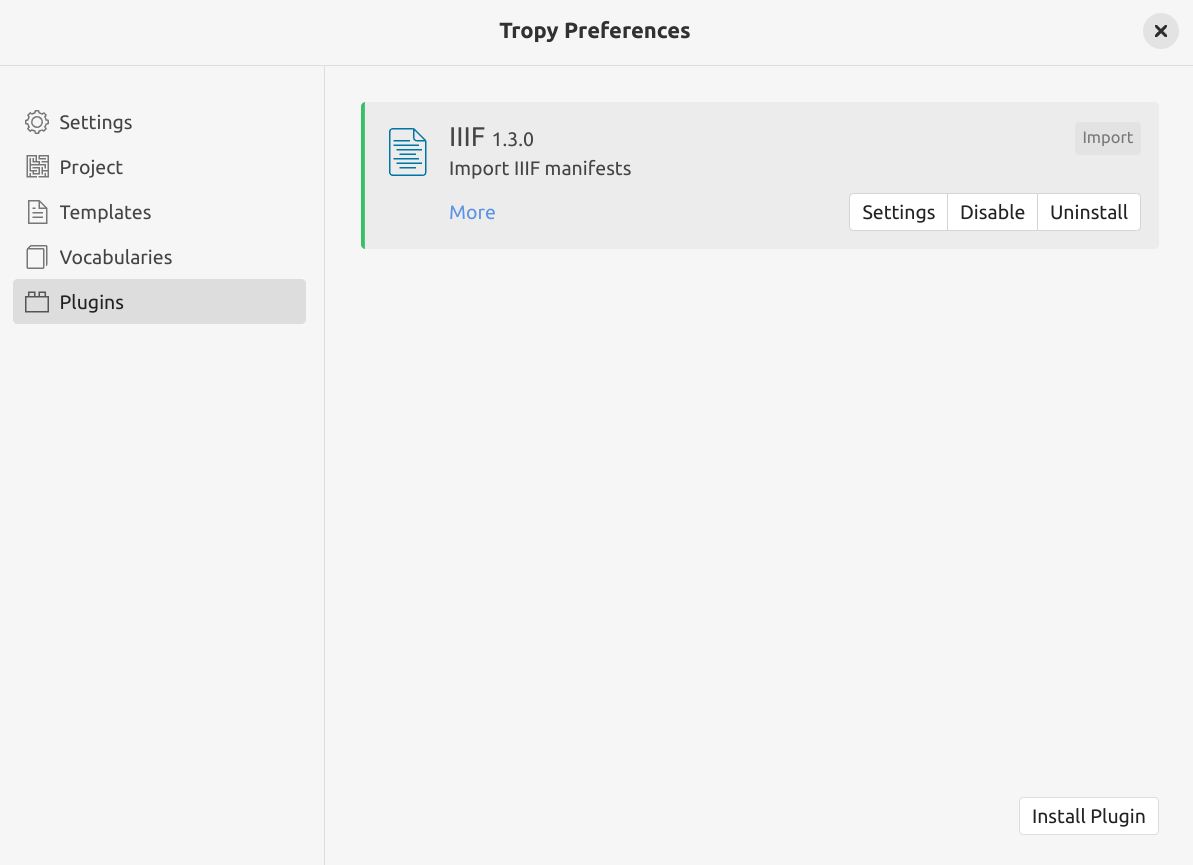
Fig. 28.14 The Tropy plugins page with the IIIF plugin installed and enabled.#
Configuring Tropy (optional)#
The Save a collection of digitised images as an IIIF manifest notebook tries to save useful metadata describing each item in a collection (as well as the collection itself). Besides the title, the metadata fields it looks for are:
typecreatordatepublisherpagesextentrightsurlcall number
If values for these fields are available they’re saved in the IIIF manifest. However, these fields won’t automatically appear in Tropy. To display all the Trove metadata you need to align the harvested fields with the vocabularies used by Tropy. There are three steps involved:
install the BIBO vocabulary
install the IIIF Trove import template
set the IIIF Import plugin to use the Trove template
Install the BIBO vocabulary#
Tropy comes equipped with a number of commonly-used metadata vocabularies. However, it’s currently missing BIBO (the Bibliographic Ontology).

Fig. 28.15 Click on the plus sign to add a new vocabulary#
To install BIBO in Tropy:
download the BIBO ontology and save to your local computer
open Tropy and select ‘Preferences’ from the ‘Edit’ menu
select the ‘Vocabularies’ tab
click on the + at the bottom of the vocabularies list and select the downloaded BIBO file
Warning
When you install the BIBO vocabulary you may be confronted by a series of scary looking warning messages. You can safely ignore these messages. Just click on Dismiss or OK to get rid of them. The warnings are caused by the fact that BIBO embeds references to vocabularies that are included in Tropy by default. Tropy refuses to overwrite the default vocabularies, and generates warnings if you try.
Install the IIIF Trove import template#
Tropy uses templates to control how metadata is displayed. You can create new templates to meet the needs of particular projects, collection sources, or format types. I’ve created an ‘IIIF Trove import’ template that maps Trove fields to Tropy vocabularies.
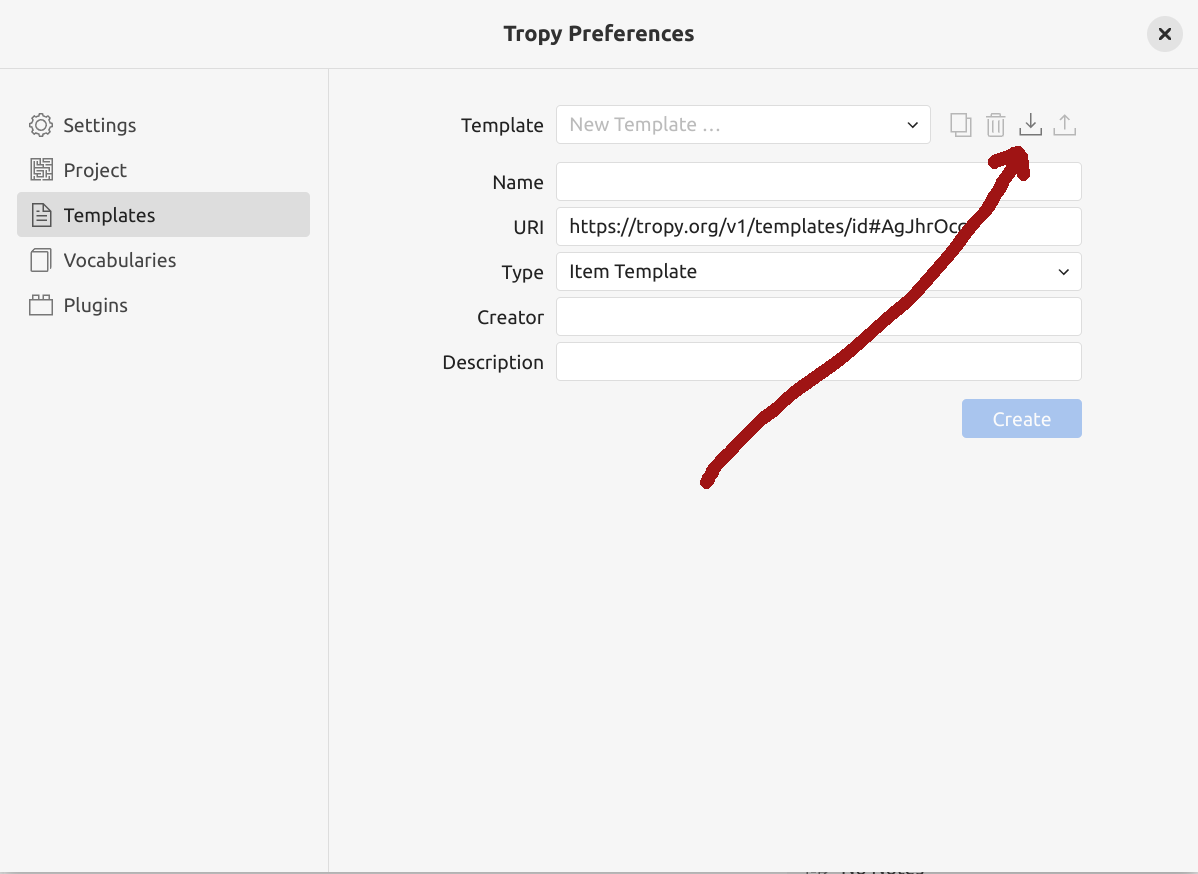
Fig. 28.16 Click on the import symbol to install a new template.#
open the IIIF Trove import template on GitHub
save the template to your local computer by selecting ‘Save Page As’ from the right-click menu
open Tropy and select ‘Preferences’ from the ‘Edit’ menu
select the ‘Templates’ tab
click on the import icon at the top of the new template form
select the downloaded template file
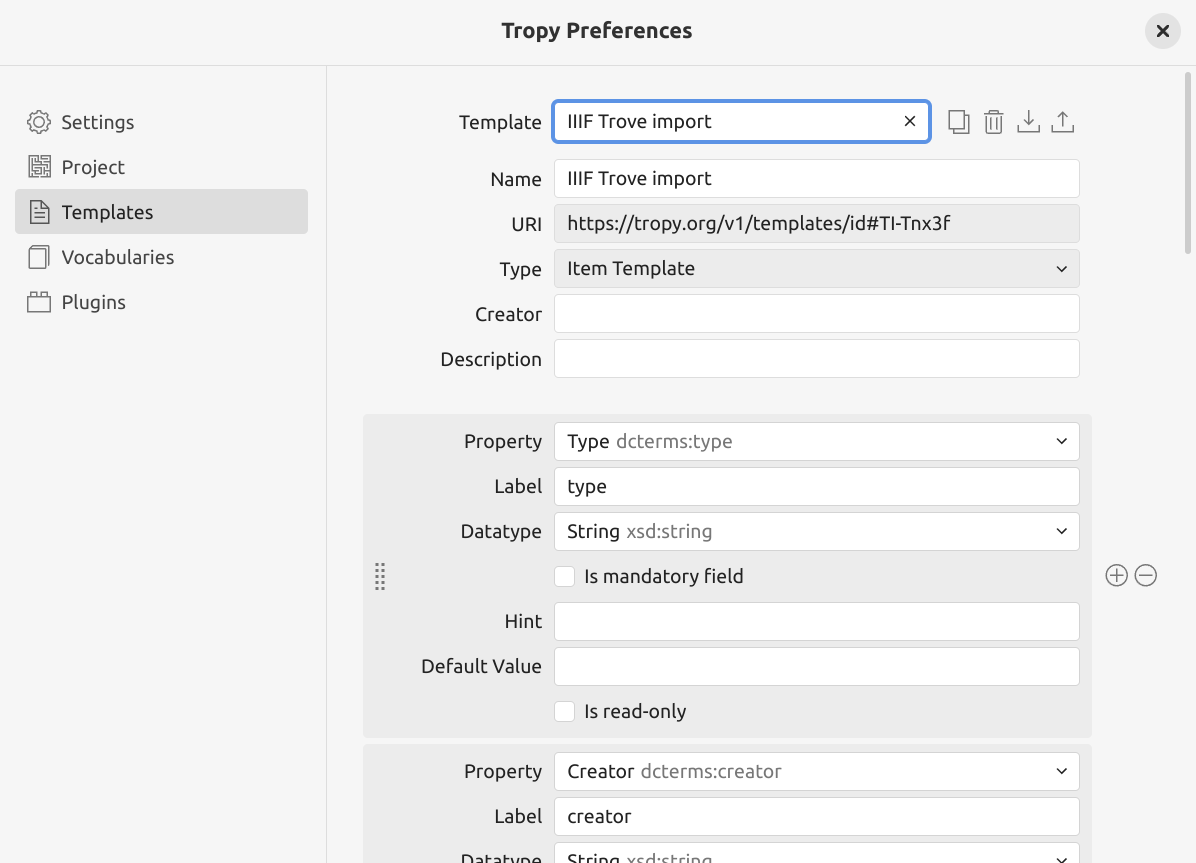
Fig. 28.17 The IIIF Trove import template installed in Tropy.#
Set the IIIF Import plugin to use the Trove template#
Finally, you need to tell the IIIF import plugin to use the new template. This will ensure that the metadata fields are mapped correctly when you import a new Trove manifest.
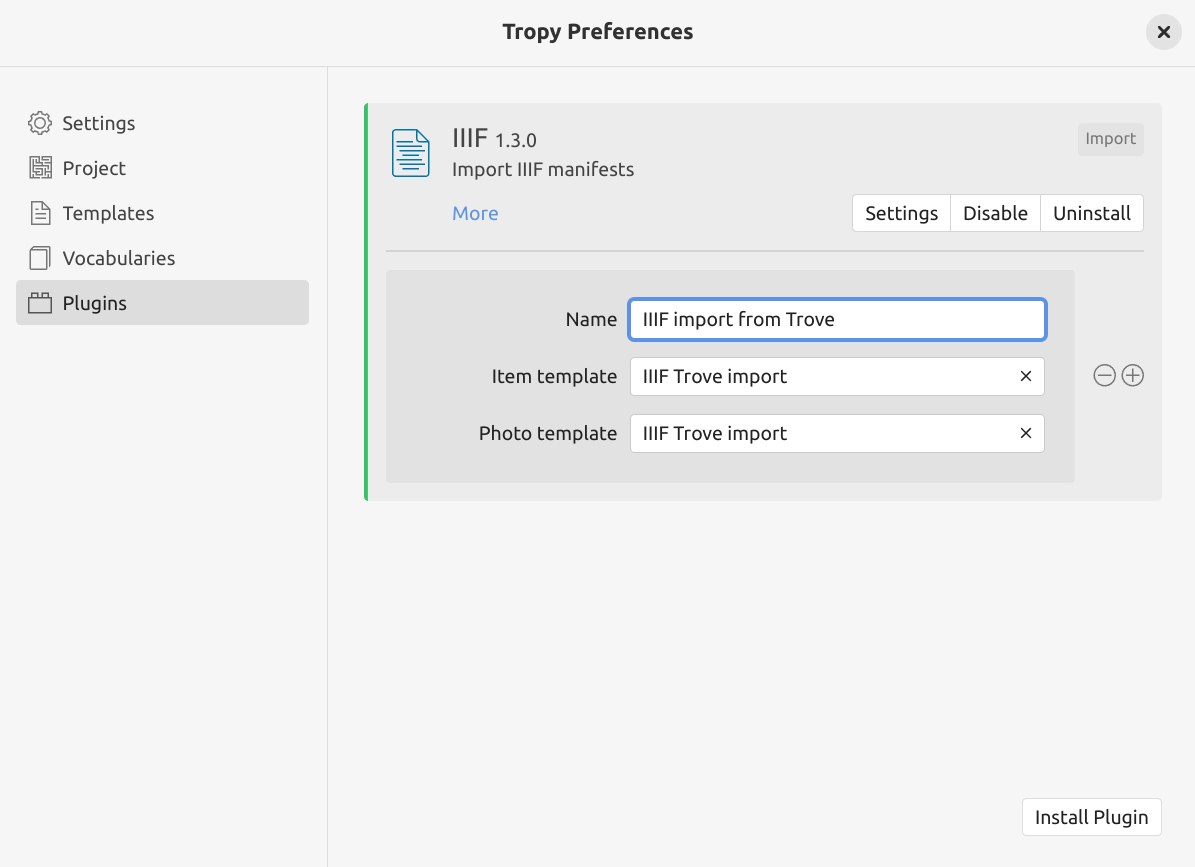
Fig. 28.18 Create a new profile in the IIIF plugin settings.#
The IIIF plugin can have multiple profiles, each using its own set of templates. To create a new profile for Trove imports:
open Tropy and select ‘Preferences’ from the ‘Edit’ menu
select the ‘Plugins’ tab
click IIIF plugin’s Settings button to create a new profile
enter a name for this profile in the ‘Name’ field, for example, ‘IIIF import from Trove’
in the ‘Item template’ field, select the ‘IIIF Trove import’ template from the dropdown list
in the ‘Photo template’ field, select the ‘IIIF Trove import’ template from the dropdown list
Importing the manifest into Tropy#

Fig. 28.19 Select File > Import > IIIF import#
To import your Trove collection manifest into Tropy:
select the IIIF import option under the ‘File’ > ‘Import’ menu (the actual name of the IIIF import option will depend on whether you’ve created a Trove profile in the plugin’s settings)
navigate to the location of your downloaded IIIF manifest and select it
Warning
When you import the manifest, Tropy tries to download all the images described within the manifest. Sometimes this seems to fail, and little warning icons will appear next to images that couldn’t be loaded.
Clicking on the icons individually seems to load the missing images. You can also try selecting ‘Consolidate Photo Library’ from the ‘File’ menu.
Organising Trove collections in Tropy#
Tropy provides a number of mechanisms for organising the contents of your imported collections, so your research is no longer bound by Trove’s descriptive framework. One thing to note, however, is that the whole IIIF manifest is imported into Tropy as a single ‘Item’, with individual images grouped as ‘Photos’ within that item. This limits your options for re-organising images. Fortunately, there’s a quick solution. Right click on the manifest ‘Item’ and choose ‘Explode’ from the menu.
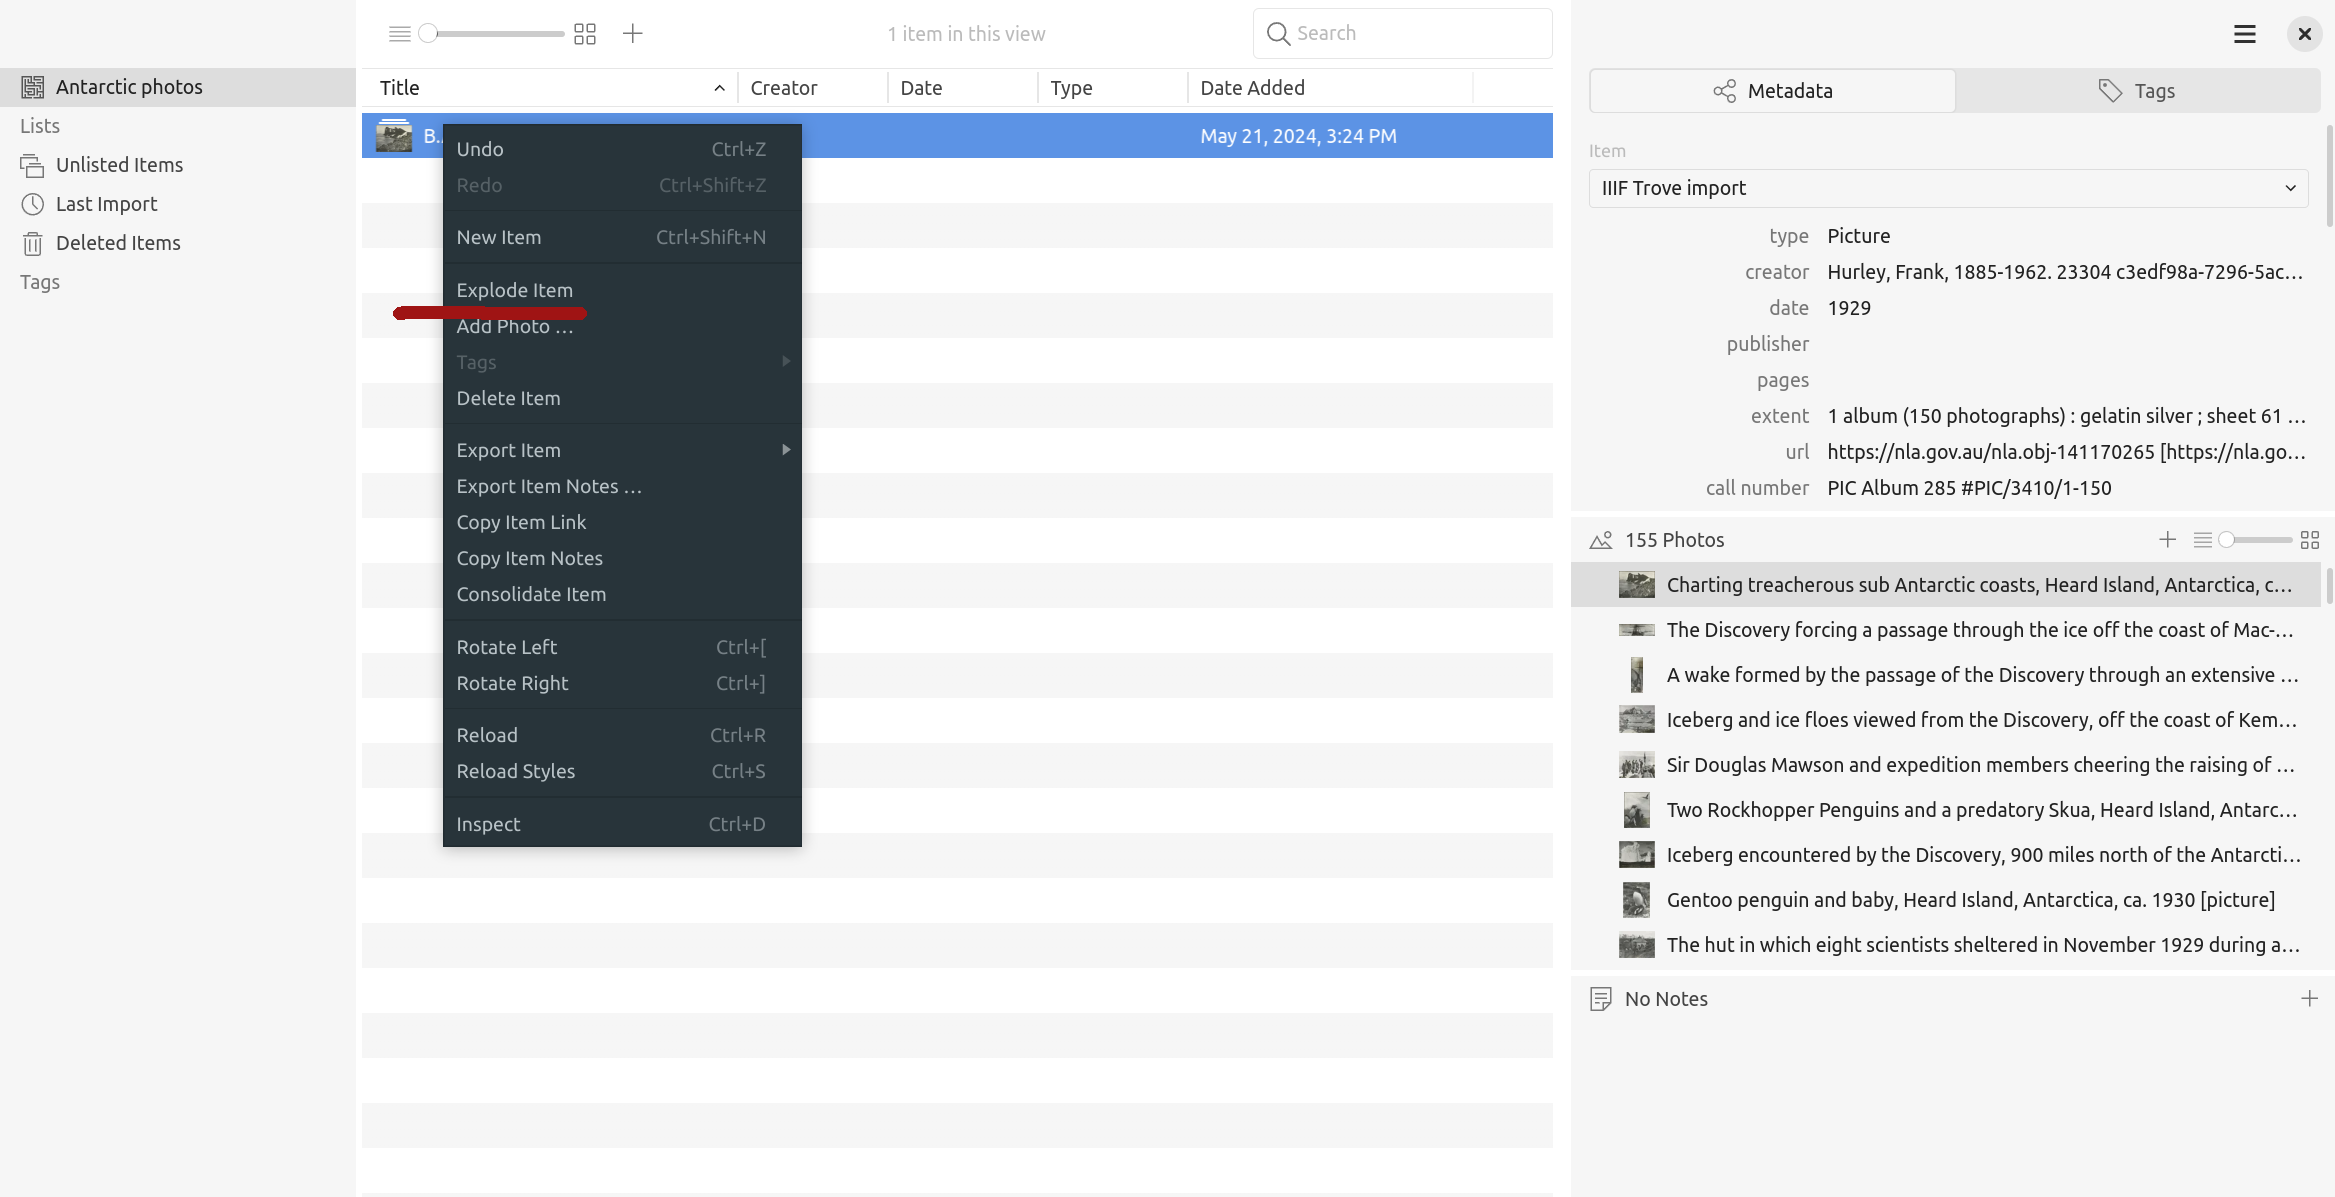
Fig. 28.20 Choose ‘Explode’ from the item menu#
‘Explode’ will split the manifest, creating a new item for each image. You’re then free to group the items as your project requires. Consult the Tropy documentation to find out about creating your own structures with lists and tags. There’s also a ‘Combine’ option that works like ‘Explode’ in reverse, grouping individual images together as a single item.
This video provides a quick introduction to the possibilities of Tropy:
Saving and sharing your research#
It’s always important to think about what happens to your data at the end of a project. Tropy helps you save and share your research by providing a variety of export options.
From the ‘File’ menu, choose ‘Export’ to save your data as a JSON-LD file. This file saves all your metadata, annotations, and notes in a structured, machine-readable format. Saving this to an approprate repository will help document and preserve your research process and provide signposts for other researchers. Your can also export your work to a PDF file.
Plugins extend Tropy’s export options:
the CSV plugin lets you import and export CSV files (spreadsheets)
the CSL plugin lets you export items to Zotero
the Archive plugin lets you export all your metadata and images as a single zip file
If you’d like to share your carefully curated and annotated research collection for others to explore online, you can use the Omeka plugin to export items to Omeka S.